Embark on an unparalleled television journey with Sky Q, the next-generation home entertainment system. Renowned for its high-definition quality and versatile viewing options, Sky Q elevates your TV experience to new heights. This comprehensive guide walks you through the essential steps of Sky Q installation, ensuring you harness the full potential of this cutting-edge technology. From selecting the right devices to understanding technical requirements and troubleshooting, we’ve got you covered. Dive into the world of Sky Q and transform your home entertainment landscape.
Understanding Sky Q: Devices and Features
Sky Q is more than just a TV service; it’s an integrated entertainment system that brings a new dimension to your viewing experience. At the heart of Sky Q is the Sky Q box, available in both 1TB and 2TB versions, which acts as the primary hub for your satellite TV. This device offers extensive storage for recordings and supports Ultra HD content, ensuring you don’t miss a moment of your favourite shows in stunning clarity.
The Sky Q mini boxes complement the main box, which is key to extending your Sky experience to other rooms. These compact units wirelessly connect to the main box, allowing seamless access to live TV, recordings, and streaming services throughout your home.
Central to the system’s connectivity is the Sky Hub, which links your Sky Q devices and enhances your home’s internet coverage. This ensures a stable and robust network connection, vital for uninterrupted streaming and on-demand services.
With Sky Q, customisation is at your fingertips. Choose from various bundles, each offering unique channels and features tailored to your interests, whether it’s movies, sports, or family entertainment. The innovative Sky Q touch remote further enhances this experience, offering intuitive navigation with touch and voice-activated controls, bringing the ease of modern technology right into your living room.
Sky Q’s devices and features are designed to provide a versatile and immersive viewing experience. By understanding these components, you’re well on your way to enjoying everything Sky Q has to offer.
Steps for Installing Sky Q Box
Installing your Sky Q box is a straightforward process, ensuring you can quickly enjoy your premium TV experience. Here’s a step-by-step guide to make the installation seamless:
- Order Your Bundle: Begin by selecting your ideal Sky Q bundle. Whether you’re upgrading from Sky+ or are a new customer, Sky will provide you with a viewing card sent via post. This card is essential for activating your Sky Q service.
- Schedule Installation: Once your bundle is ordered, arrange a convenient date for installation. Sky’s professional engineers handle the setup, ensuring everything is perfectly configured.
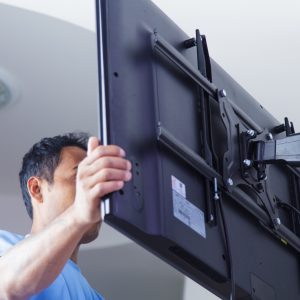
- Engineer’s Visit: On the appointed day, a Sky engineer will arrive to install your Sky Q box. They will replace your existing TV box, adjust your satellite dish for optimal reception, and set up the Sky Q mini boxes in your chosen locations. This process ensures that every room in your house is connected to the Sky Q experience.
- System Setup: The engineer will connect your Sky Q box to the satellite, your TV, and the internet. They’ll also guide you through the basic features of your new system, ensuring you’re comfortable navigating the Sky Q interface.
- Final Checks: Before leaving, the engineer will perform a series of checks to confirm everything is working correctly, from signal strength to remote control functionality. This ensures that your Sky Q experience starts off without a hitch.
By following these steps, your Sky Q installation will be hassle-free, allowing you to dive into a world of endless entertainment with ease and convenience.
Technical Requirements for Sky Q
Meeting specific technical requirements ensures your Sky Q system operates flawlessly. Here’s what you need to know:
- Satellite Dish Compatibility: Sky Q requires a compatible satellite dish. If your existing dish needs to be updated, a new installation may be necessary. The Sky engineer will assess and, if required, upgrade your dish during installation.
- Cable Requirements: Sky Q generally utilises your existing satellite cables. However, in some cases, cable extensions or replacements are needed to ensure optimal signal quality and system performance.
- Internet Connection: A robust and stable internet connection is pivotal for Sky Q. The system relies heavily on internet connectivity for streaming and accessing online content. The Sky Q box should ideally be connected to your Wi-Fi network or directly to your router via an Ethernet cable for a more stable connection.
- Signal Strength: Ensuring good signal strength is critical for uninterrupted service. The Sky engineer will conduct tests during installation to ensure your satellite and internet signals are strong enough to support the Sky Q system.
You can enjoy a seamless and high-quality viewing experience with Sky Q by addressing these technical requirements.
Installation Time and Preparation
Preparing for your Sky Q installation is key to a smooth and efficient setup. Understanding the time involved and the necessary preparations will ensure a hassle-free experience.
Timeframe for Installation
- Standard Installation: Typically, installing Sky Q takes about 2-3 hours. This duration can vary depending on your specific setup requirements and any additional services you’ve opted for.
- Complex Setups: In cases where new satellite dishes are needed or extensive cable work is required, the installation time may extend beyond 3 hours. It’s advisable to allocate a half-day for these scenarios.
Preparing Your Home
- Clear Access: Ensure the engineer can access your TV area, satellite dish, and any rooms where mini boxes will be installed.
- TV and Internet Setup: Have your TV and internet router in place. This helps the engineer quickly connect and configure your Sky Q system.
- Personal Preferences: Consider where you want the main and mini boxes located. Clear these areas to facilitate easy installation.
By adequately preparing your home and understanding the installation timeframe, you can make your Sky Q setup experience as smooth as possible.
FAQs about Sky Q Installation
Do I need a new satellite dish for Sky Q?
- New Dish Requirements: Not always. If your current dish is compatible and in good condition, it can be used for Sky Q. However, some older models may need replacing. Your Sky engineer will assess and advise accordingly during installation.
Can I use my existing cables with Sky Q?
- Cable Compatibility: Yes, Sky Q often works with existing satellite cables. In some cases, your engineer might recommend new or additional cables to enhance signal quality.
How does Sky Q connect to the internet?
- Internet Connectivity: Sky Q requires a strong and stable internet connection. It connects to your home network wirelessly via Wi-Fi or through an Ethernet cable to your router.
Will I need professional installation for Sky Q?
- Professional Installation: Yes, to ensure optimal setup and performance, Sky Q installation should be done by a professional Sky engineer. They handle everything from dish alignment to system configuration.
How long will the Sky Q installation take?
- Installation Duration: The standard installation usually takes around 2-3 hours. This can vary based on individual requirements and any additional services.
Can I install Sky Q myself?
- Self-Installation: Sky Q installations require technical expertise, especially for satellite alignment and system integration. Therefore, it’s recommended to have it installed professionally.